September 30, 2012

Dental Care Day 3: Dental Care

Dental Care
Read: Brushing Teeth by Mari Schuh, Flossing Teeth by Mari Schuh and At the Dentist by Mari Schuh

Discuss: It is important to brush and floss your teeth every day, and visit a dentist once a year for a check up. Show an apple. Say the apple will be the tooth. Poke a hole into an apple and say that is what a cavity is, a hole in your tooth. 
 Cavities can form when we don't brush and floss our teeth. Let it set for a day and notice how yucky it gets in the apple.

Show the child how to brush the front, back, and insides of the teeth. Then show the child how to floss each tooth properly.

Comprehension Questions:
1. How can we take care of our teeth? Brush, floss, and visit the dentist

Stained Teeth
Discuss: 
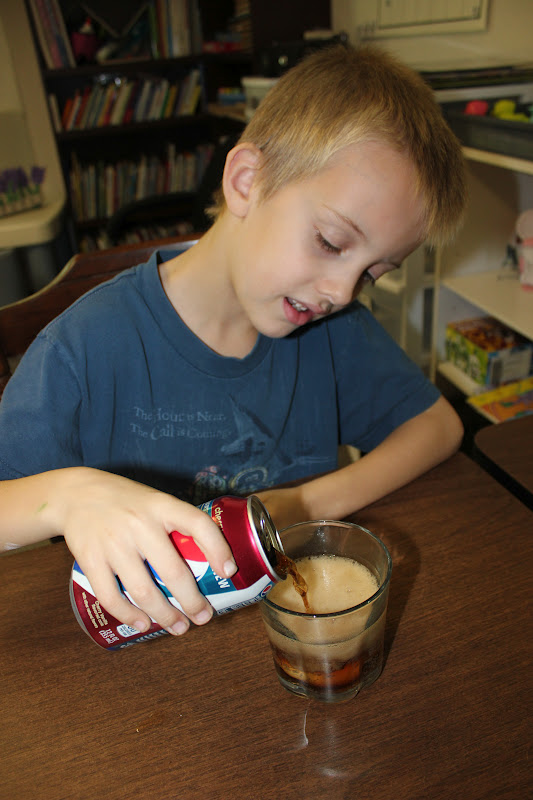
Soda is bad for your teeth. It can stain them brown. You should brush your teeth after you drink soda.

Materials:
  • Hard boiled egg
  • Cola
  • Cup
  • Old toothbrush
Directions:
  1. Show the hard boiled egg. Doesn't it look nice and white like our teeth? Why is there a shell around the egg? Because the shell protects the egg. Our teeth are protected by the enamel just like the egg.
  2. Put the egg in a cup.
  3. Pour in the cola.
  4. Let it set for at least an hour (the longer the better).
  5. When you take it out notice how dark it looks now. That's what happens to our teeth if we don't brush after drinking soda.
  6. Try to brush away the brown with an old toothbrush. It's hard to get every bit of the brown, just like it's hard to get every bit of every tooth in our mouths. We need to brush every part of every tooth every day.

Brushing Molars
Discuss: It is important to brush all around every tooth, not just the front of the teeth.  We discussed the Proper Way to Brush our Teeth from page 2 of this download that I found.

Materials:
  • Soda Bottle
  • Scissors
  • White Paint
  • Old Toothbrush
Directions:
  1. Cut off the bottom of the soda bottle.
  2. Paint it white to look like a molar.
  3. Show the child how to brush all of the tooth, not just the front where you can see.

Flossing Teeth
Discuss: It is important to floss your teeth to get the food that the toothbrush can't reach.
Materials:
  • Egg Carton
  • Tissue Paper
  • Floss
  • Red Construction Paper
  • Glue
Directions:
  1. Cut apart each section of the egg carton.
  2. Cut out a semi-circle from the red paper.
  3. Glue the egg carton sections around the round part of the red paper for the teeth.
  4. Stick pieces of tissue paper in between the teeth.
  5. Use the floss to get out the tissue paper.

Dental Care Day 2: Types of Teeth

Types of Teeth
Read: All About Teeth by Mari Schuh and Snacks for Healthy Teeth by Mari Schuh

Discuss: Humans have 20 baby teeth and then at age 6 or 7 they begin to fall out and we get 32 permanent teeth. There are 206 bones in your body. Of those 206 bones, which are the hardest ones? Yes, teeth are the hardest bones in the human body. If teeth are so hard and strong, then why do they decay and break? Well, it’s because of the germs. We get germs in our teeth when we eat, so we must brush our teeth every day.

Incisors- front 8 teeth for cutting
Canine- 1 next to each outside incisor for tearing
Molars- the back teeth for grinding

Comprehension Questions:
  1. What are the incisors used for? Cutting
  2. What are the canines used for? Tearing
  3. What are the molars used for? Grinding
Totally Teeth!
Discuss: We talked about page 4 and did page 5 of the Parts of a Tooth Speedy Science download. 

Activity:  Then we did the Totally Teeth! activity that I found on pave 27 in The Best of THE MAILBOX Theme Series: Dental Health (Grs. K-1).  J just cut out the types of teeth from the bottom and glued them into the mouth where each type belonged.

Mouth Model

Materials:

  • Mouth Model download
  • Pink construction paper
  • glue
  • scissors
Discuss:
Incisors- for cutting
Canine- for tearing
Molars- for grinding
Directions:
  1. Cut out the white teeth strips.
  2. Cut out 2 stripes of pink paper 1 inch by 10 inches for the gums.
  3. Cut out 1 piece of pink paper 4x4 inches.
  4. Glue the white teeth to the inside of the gums so that only the teeth stick out.
  5. Then glue the ends of the pink strips to the pink square piece bending the teeth in the shape of a mouth.
     
Baby Teeth
Discuss:  We discussed page 17 of Parts of a Tooth Speedy Science and looked at J's baby book to see when he got his teeth.
 
Directions:
  1. Look at baby book and see when you got your teeth.
  2. Look at the sheet and compare.
  3. Try to remember when you lost your first tooth and which one it was.
  4. Look at the sheet and compare.

The Tooth Fairy Came Last Night
We used this free download to complete the fun poem called The Tooth Fairy Came Last Night and to review coins and their value.

Dental Care Day 1 -Tooth Anatomy

Tooth Anatomy
Read: I Know Why I Brush My Teeth by Kate Rowan

Discuss: Our teeth are very important. They help ups eat and talk. It is very important to take good care of your teeth so you will have them forever.

Crown- The part of the tooth that you can see sticking out of your gums.
Root- The part of the tooth that holds the tooth to the bone.
Enamel - A hard substance the covers the tooth and lies over the dentin.
Dentin - A yellow substance, harder than bone, that makes up most of the tooth.
Pulp - The innermost layer of the tooth.
Cementum – Covers the root of the tooth.

Comprehension Questions:
  1. What is the part of the tooth that you can see called? The Crown
  2. What is the part of the tooth that is under the gums connected to the jaw called? The Root
  3. What is the hard protective covering on the tooth called? The Enamel
Tooth Diagram
Discuss:  We used the diagram on page 3 of the Parts of a Tooth Speedy Science download.  I also found a good diagram on page 23 of The Best of THE MAILBOX Theme Series: Dental Health (Grs. K-1) that I used.

Enamel - A hard substance the covers the tooth and lies over the dentin.
Root- The part of the tooth that holds the tooth to the bone
Pulp - The innermost layer of the tooth.
Dentin - A yellow substance, harder than bone, that makes up most of the tooth.

Materials:
  • Construction Paper
  • Glue
  • Pen
  • Scissors
Directions:
  1. Cut a tooth outline from white paper. Or use the pattern on page 15 of  The Best of THE MAILBOX Theme Series: Dental Health (Grs. K-1)
  2. Cut out a pink tooth outline a bit smaller than the white one.
  3. Cut out a red piece even smaller than the pink one.
  4. Label the top of the white “enamel” and the bottom “root”
  5. Label the pink “dentin” and the red “pulp”.

Number Crunching
I found a free Number Crunching subtraction worksheet. We used it to review barrowing to solve subtraction problems.

Set of Teeth Game
I found this Set of Teeth Game that we played with mini marshmallows.  We rolled the dice and added that many marshmallows to our set of teeth.
  
Edible Teeth
Materials:
  • Apple slices
  • Mini marshmallows (we used the mini marshmallows from the activity above so the boys didn't have too many sugary foods while I was trying to teach them about taking care of our teeth)
  • Peanut butter
Directions:
  1. Spread peanut butter on an apple slice and stick mini marshmallows to it.
  2. Add another apple slice with peanut butter to the top of the marshmallows.

Dental Care Unit Study

Dental Care Unit Study

J lost his 4th tooth so we decided it was a good time to do a Dental Care Unit Study.  In this unit study we learned about types of teeth, tooth anatomy and taking care of our teeth.  I did this unit study with my 2nd grader and would recommend it for 1st grade through 4th grade. 

 
Dental Care Book List
Books I used in the Lessons:
I Know Why I Brush My Teeth by Kate Rowan
All About Teeth by Mari Schuh
Snacks for Healthy Teeth by Mari Schuh
Brushing Teeth by Mari Schuh
Flossing Teeth by Mari Schuh
At the Dentist by Mari Schuh

Other Age Appropriate Books:
The Tooth Book by Dr. Seuss
The Magic School Bus and the Missing Tooth by Jeanette Lane
The Crocodile and the Dentist by Taro Gomi
Andrew's Loose Tooth by Robert Munsch
The Berenstain Bears Visit the Dentist by Stan & Jan Berenstain

September 29, 2012

Native Americans Day 23: Native American: Homes

Native American: Homes
1. Review: Northwestern Native Americans lived in longhouses with totem poles. Plains Native Americans lived in teepees to move easily. Pueblo Native Americans lived in pueblos as a type of defense. Woodland Native Americans lived in longhouses with a palisaide around the village.
2. Map Skills: Look at a map of the U.S. And have the child point to each area, northwestern, plains, southwestern, and woodland. Have the child tell you something that they remember about that region.
3. Discuss: Talk about each region reviewing the tribes that lived in each region and what they lived in.
4. Read: The Very First Americans by Cara Ashrose or North American Indians by Marie and Douglas Gorsline

Native American Play
The boys played with the Indian houses that they had made throughout this unit study (except the igloo, the ants found it).  They used their Playmobil pirates to live in the houses.  The pueblo is definitely a favorite!

Native American Homes
Materials:
  • White Poster Board
  • Pencil
  • Sharpie
  • Scissors
  • Brown Construction Paper
  • Tape
Directions:
  1. Use the pencil to draw an outline of the U.S. Onto the poster board. Trace the pencil line with the sharpie.
  2. Cut out the U.S. Outline.
  3. Use the pencil to draw an outline of a Southwest pueblo, Plains teepee, Northwest lodge, and Woodland longhouse onto the brown paper.
  4. Use the sharpie to trace the outline and then cut them out.
  5. Have the child tape them in the proper spot on the U.S. Map and then use the sharpie to write the Native American region name.
Cahokia Mounds
 We visited Cahokia Mounds in IL.  We spent some time in the museum and then went out to climb Monks Mound.  We happened to be there for archeology day so the boys got to participate in some hands on activities.
 In the museum there were all kinds of old Indian items.
 There was a dig site set up for the boys to see what an archeologist does.
 The boys learned what raw materials the Indians used to make useful items.
 The coil pot method that we tried earlier in this unit study.
 There was an Indian village set up for the boys to walk through.
 An Indian catch the ring game.
 Another game like the basket game that we made earlier in the unit study.
 They got to feel different animal fur and see the skulls that went with each animal too.
 Sifting through actual rock, bone, and pottery that was found at the dig site.
Flintknapping, they tried to make an arrowhead but it took way too long to keep them interested.
 A girl showed them how to mix clay with water to make face paint.
 Then she painted J's face for him.
 He was loved having the face paint on and we even gave him an Indian name "Chief Talks-a-lot".
 Looking at some of the different plants from the area.
 Getting ready to climb Monks Mound.
 There it is!
 Up, and up, and up!
We made it to the top!